Are Your Knifes Making The Cut?

Chefs, utility, paring, steak, and bread knifes can be found in almost any kitchen that is used on a daily basis. The real question is, when do you use each one?

When I was ten years old I was in my kitchen trying to cut an apple in half– with a paring knife. Twelve years later I still have the scar to show how dangerous incorrect knife usage can be. That was the day I learned the importance of using the right type of knife and proper usage. Using the correct knife can help form crushing you food and can keep you safe from injury.

  1. Chef’s Knife– Its best daily usage is for chopping, slicing, dicing and mincing– commonly used on vegetables etc. My personal favorite is on sale now with the code TRYMISEN20 and can be purchased here: https://misen.com/products/chefs-knifeimg_chefs-knife
  2. Utility Knife– The perfect medium of a chefs knife and a paring knife this can be used for tasks like cutting meats or larger fruits if needed, or even simple jobs like cutting a sandwich in half.img_utility-knife
  3. Paring Knife– similar to a chefs knife this one is used for more precise tasks like peeling things or culling up small fruits and vegetable. For under $10 you can’t go wrong with the Victorinox 3.25 in. blade, available on sale here: https://www.amazon.com/Victorinox-Swiss-Classic-Paring-Straight/dp/B0061SWLKW/ref=asc_df_B0061SWLKW/?tag=hyprod-20&linkCode=df0&hvadid=198090821251&hvpos=&hvnetw=g&hvrand=17611701795272089769&hvpone=&hvptwo=&hvqmt=&hvdev=c&hvdvcmdl=&hvlocint=&hvlocphy=9014965&hvtargid=pla-350651045983&psc=1img_paring-knife
  4. Steak Knife– used to cut tougher meats once they are fully cooked this knife should be the only truly sharp knife that is offered within a meals place setting. This knife can be serrated or flat.img_steak-knife.png
  5. Bread Knife– Long and serrated, the bread knife will most commonly slice through the bread instead of crushing it like a non-serrated one. As well as this it’s great for slicing tomatoes or citrus fruits for the same reason.img_bread-knife

Above all, knives should always be sharp when used. Despite popular belief, you’re more likely to injure yourself using a dull knife rather than a sharp one. Before I get started in the kitchen I sharpen every knife I’ll be using with the Brod & Taylor manual sharpener. While many prefer and electric sharpener, I love that this can sit on my counter and be ready for use every day without taking up too much space. I’m also able to use a wider variety of knives due to the flexibility a manual sharpener brings.

61UiI7ykPhL._AC_SL1500_

When used correctly, you shouldn’t have to apply much pressure when practicing knife skills, cuts should be smooth and seamless. If you find yourself forcing a cut, stop to evaluate if you’re using the correct tool for the job. Chef Billy Parisi uploaded a quick tutorial to YouTube which I found very informative, watch it here: https://www.youtube.com/watch?v=VJNA4vrdWec

Make THIS for Dinner Tonight

Earlier this week after a late night at the office I was scrambling to find something I could make quickly, with ingredients I already had around the house. After a quick google search I found a recipe that I thought was “good enough” off of some random site and set off to make it. While I wasn’t very excited about the recipe it looked healthy and fast– and the ingredients were already in my kitchen so I set off making it. Thirty minutes later I was copying the recipe down into a list of my favorites and just had to share it.

The “Quick Chicken Piccata” I made called for–

The directions were well written and easy to follow instructing me to–

  1. Place chicken breasts between 2 layers of plastic wrap and pound to about 1/2-inch thick.
  2. Season both sides of chicken breasts with cayenne, salt, and black pepper; dredge lightly in flour and shake off any excess.
  3. Heat olive oil in a skillet over medium-high heat. Place chicken in the pan, reduce heat to medium, and cook until browned and cooked through, about 5 minutes per side; remove to a plate.
  4. Cook capers in reserved oil, smashing them lightly to release brine, until warmed though, about 30 seconds.
  5. Pour white wine into skillet. Scrape any browned bits from the bottom of the pan with a wooden spoon. Cook until reduced by half, about 2 minutes.
  6. Stir lemon juice, water, and butter into the reduced wine mixture; cook and stir continuously to form a thick sauce, about 2 minutes. Reduce heat to low and stir parsley through the sauce.
  7. Return chicken breasts to the pan cook until heated through, 1 to 2 minutes. Serve with sauce spooned over the top.

I followed this exactly as it said and it turned out great! While I’m normally one to change recipes as I go this one turned out perfectly done and really flavorful. Done i3067683n 25 minutes and paired with balsamic asparagus it was wonderful!

Bringing Experiences Home

In 2017 I traveled with my mom to South Korea and Cambodia for a dental mission trip. While we were there, among other amazing experiences, we were able to completely immerse ourselves in their food culture. While we tried some things that could never come back home with us, like eating grilled tarantulas, a Korean classic has stayed with us for years.

We first tried traditional Bibimbap on the plane on our way to Seoul. My mom and I fell in love and had it countless time throughout our trip. We came home gushing about it and decided to try it ourselves. It consists of rice topped with ground beef, shredded carrots, cooked spinach, bean sprouts, mushrooms, fried eggs, sesame oil, and Korean chili paste. While every recipe varied each one brought us back to Cambodia for just a second. Even without the experience to pair it with, I encourage anyone to try this traditional dish. See the link below for a recipe I’ve tried and really liked.

https://mykoreankitchen.com/bibimbap-korean-mixed-rice-with-meat-and-assorted-vegetables/

Kitchens Aren’t Just For Cooking

As a babysitter I’ve spent hours with kids who just keep asking what there is to do. Usually parents will leave a never ending list of activities to do, and the time goes by without a breeze. On the occasion that they don’t I always turn to the kitchen.

From popcorn to three ingredient peanut butter cookies I’ve made almost every no-mess treat there is. The problem is, what to do when they’re not hungry? That’s when I realized the kitchen doesn’t just need to be for cooking. Below is a simple play dough tutorial for anyone with some bored kids at home and is looking for a five minute solution with ingredients you probably have laying around anyway.

Click below to watch!

What Should You Be Doing Before Cooking?

Cooking is an art that is almost impossible to perfect, though many people try to. What many people don’t know is that part of the perfection in cooking happens before you even start to prepare the first ingredient. Following five easy procedures before you begin can help keep you safe and make cooking much easier.

  1. Wash your hands– Personal hygene is th eforst step to the safest way to cook. By throughtly washing your hands before touching anything you can take the first step to preventing any transfer of bacteria and germs form ourslef, to food, and eventually other people.
  2. Read the entire recipe and make sure you have every necessary item– One of the msot common mistakes in cooking is getting half way throught the recipe, then realizing you do not have every ingredient. By throughtly reading through the entire thing you cna be sure tp catch and missing items before you start cooking under a time constraint.
  3. Clean any counter top space in your kitchen– It’s impostant to clean any counter top space that you ahve, not just what you plan on doing. It’s easy to need more space then you think you might and you only create problems for yourself if you try to clean it off in the middle of cooking. As well as this a clean space also helps to orevent the spread of germs as bacteria sitting on counters ould get into your food if they are not cleaned before working.
  4. Wash any already unclean dishes in the sink– Having a place to put dirty dishes prevents the built up of them on the counter space you jsut cleaned.
  5. Take out all necessary ingredients and tools– having everything out already will prevent rushing to find things or burning the meal you worked so hard to perfect.

Secret Healthy Foods You Never Knew About

As a follow up to my last blog post I wanted to create a lust of healthy foods that really are health. While I did provide a few alternatives to junk foods I liked the idea of a bigger list to chose from. This is a list of some of my favorites with recipes included on how to make them.

Kale Chips. (My personal favorite. They’re good you won’t even realize they’re veggies, I promise!) http://allrecipes.com/recipe/176957/baked-kale-chips/

Home Made Granola. http://allrecipes.com/recipe/15035/granola/?internalSource=hub%20recipe&referringContentType=search%20results&clickId=cardslot%207

Apple Crisps. http://allrecipes.com/recipe/233281/apple-chips/?internalSource=hub%20recipe&referringContentType=search%20results&clickId=cardslot%201

Roasted Chic Peas. http://allrecipes.com/recipe/241874/crunchy-spiced-chickpeas/

Comment your favorites to share with everyone else!

“Healthy” Foods That Aren’t So

It’s common for foods to be generically categorized into healthy and unhealthy. Sometimes we have associations about the health of products without it being evidence based. If you’ve never looked at the nutrition facts or anything, the “healthiness” of foods can be seen as a fact without factual backing. The trouble is, some of these foods are seriously categorized incorrectly. Here’s a list of the biggest ones.

  1. Wheat Products. Not all wheat products, but the ones most commonly bought. Unless a product is 100% whole wheat it can still contain enriched flour, which is highly unhealthy and contains a large amount of carbs. Try buying 100% whole wheat products for a healthier result.
  2. Dried Fruit. While it is delicious and, technically, still fruit, it is in no way healthy. It contains huge amounts of preservatives and added sugars. As well as this it contains high amounts of fat and commonly has three times the amount of calories of fresh fruit when comparing volume.
  3. Flavored Fat Free Yogurt. Just because it’s fat free, does not make it healthy. Fat free yogurt is highly comparable to fat free ice cream. Try greek yogurt instead for a real healthy choice.
  4. Pretzels. Just because you’re eating them instead of chips, doesn’t mean that’s making a real difference. Pretzels still contain high amounts of fat and even higher amounts of sodium. As well as this they’re packed with unnecessary carbs.
  5. Granola Bars. Yes, they’re great on the go snacks and easy to travel with, but that doesn’t mean they’re healthy. Most granola bars are glorified candy bars. While not all of them are bad, bad warned and look at the amount of sugar and fat before you buy them.

Additionally, not all organic foods are healthy. A common misconception is that snack foods are healthier when bought organically. While there may be a lower number of chemicals, your pop tart is still just a pop tart

When the Ants Come Marching In; and How to Get Them to March Out

It seems as if every year, right after you’re tricked into thinking it might finally be summer for the third or fourth time, you see them– the ants. It starts as one crawling slowly across your counter, but right before it disappears one more seems to come out of nowhere. Sound familiar? In our house it sure is.

ant-trail1.jpg
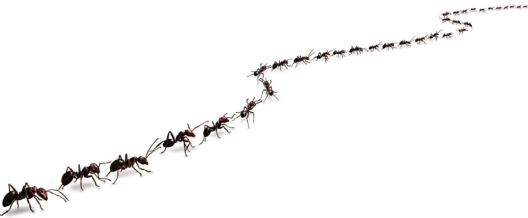
Ants can cause major damage in a matter of weeks in your kitchen; imagine the horror of hosting a dinner party and seeing one crawling across your main dish. They can cause even  ore damage than just stealing bread crumbs though. Ants have the ability to transfer thousands of germs every time they touch something– including your food.

If ant traps just aren’t doing it for you, and you still seem to find them every time you lift up a container, there are a few natural methods that can work. Sprinkling chalk powder or flour around places you’ve seen ants can help. They are drawn away from it and with their food source blocked off, will have no choice but to leave. If you’re trying to keep them out in the first place, try placing lemon juice at the barriers of your doors. Repelled by the citrus, they’ll have no way to enter.

These natural methods provide a safe way of keeping both chemicals and ants out of your kitchen, let me known if the methods worked for you, or if there are any others you know of that I didn’t mention. Happy cooking!